Configure Forms Server Logging Settings (Logging)
Each project you publish has an Forms Server component in the resulting website, which handles data requests from your forms to the Digitise Forms Configuration Database and the form's Datasources. The Forms Server can keep a log which records its actions and any errors which arise along with more technical information for use should you encounter problems when running your form(s). You can turn this logging on and off and choose the level of detail you want to include in the log.
The log can be saved to a database and/or to file and also output to a third-party debug viewer, such as Microsoft's DebugView.
You can view the Forms Server trace log using Microsoft SQL Server Management Studio for logs written to a database or using a standard text editor, such as Windows Notepad, for logs written to file. In addition, where you have opted to store the log in a database, you can email all or part of the log to a specified email address or output it to a CSV (comma separated values) file, to be imported into a third-party application capable of interpreting this type of file format.
The Logging settings also include a delete option allowing you to clear the logs from time to time.
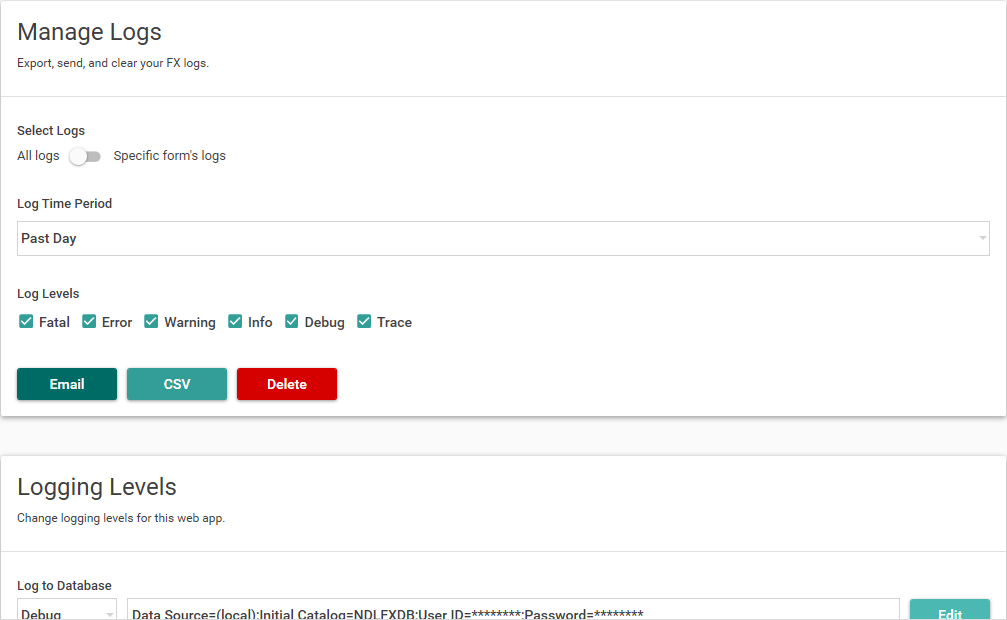
The Form Manager Logging settings allow you to configure the logging facility, initiate emailing logs or outputting to CSV file and deleting log messages.
To view and edit the Logging settings, choose Logging from the Form Manager Menu:


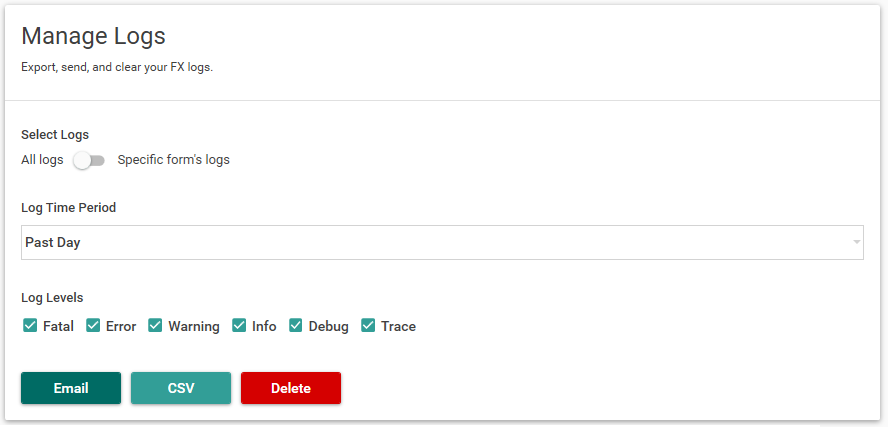
This section allows you to export, send and clear the Forms Server logs which are stored in the database specified under the Logging Levels section below. It isn't relevant for logs output to file or to a third-party debug viewer.
Allows you to choose whether you want to act on the log messages for a specified form only or on all log messages stored in the specified database.
If you set this option to Specific form's logs, an additional option, Form, will be displayed immediately below this option, allowing you to select the form, whose log messages you want to be affected by the options and buttons in this section.
If you set this option to All logs, however, all Digitise Forms logging stored in the specified database will be affected by the other options and buttons in this section. This will include Form Studio logs as well, if they are stored in the same database as the Forms Server logs.
This option is only displayed if you select Specific form's logs in the Select Logs option above. It provides a drop-down list of the forms available in the current web app, from which you can select the one whose logs you are interested in. The buttons in this section will then only apply to log messages for your selected form.
Allows you to filter the log messages by time. The buttons in this section will only apply to log messages within the time period specified here.
Select the required time period from the drop-down list or choose Custom, to specify your required start and end dates and times:

Click on the calendar in the Start Date field to select the date you want to start your filter. Click on the '<' and '>' arrows to move backwards or forwards one month. To move more quickly, click on the month/year at the top of the dialog box to display the months for the whole year. Now the '<' and '>' arrows will move you backwards and forwards one year at a time. Click on the year at the top of the dailog to move backwards and forwards 20 years at a time.
When you have selected the date, click on the clock in the Start Time field to specify the start time. A clock will be displayed allowing you to select the hour. Click on the number you want or drag the circular marker to the required hour. The clock will then change to display minutes. Click on the required minutes number or drag the circular marker to the required number of minutes.
Repeat with the end date and time fields.
Allows you to filter the log messages by message type. The buttons in this section will only apply to log messages of the type(s) specified here.
Message types which will be included have a tick in the check box beside them. By default, all message types will be included. To deselect a message type, click on it and the tick will be removed. To re-include the message type, click on it again.

Clicking this button will email the log messages you have specified in the previous options to your nominated email address.
The email settings, including the email address, need to be configured under the Manager Settings before you can email any logs.

Clicking this button will output the log messages you have specified in the previous options to a file as 'comma separated values'.
A standard Windows file manager dialog box will be displayed allowing you to specify the folder and file name in which to save the file. If your file already exists you will be asked if you want to overwrite it.

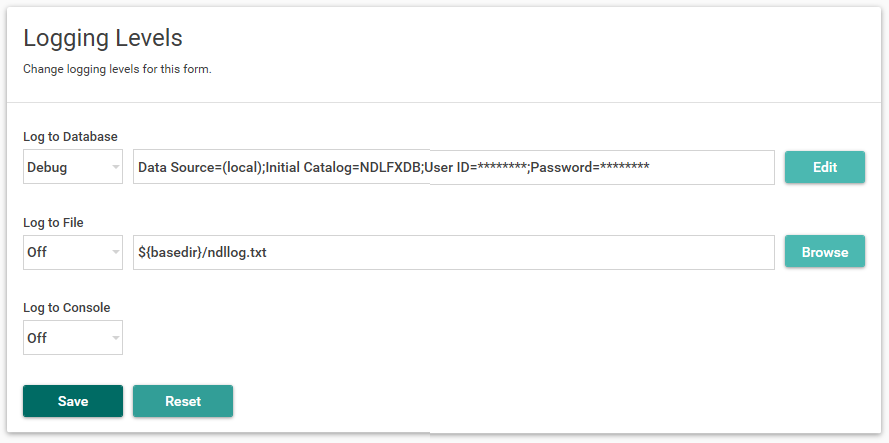
This section allows you turn logging on and off for the current web app. You can configure the various storage options independently of each other, allowing logs to be output to database, file and third-part debug viewer at the same time, if required.
Turn logging to a database on and off.
Logging to database is enabled if a logging level is displayed in the left-hand field of this option. If this box displays Off, logging to database is disabled and no log messages will be saved to your specified database.
To change the current setting, click on the box to drop-down the list of available options. The options represent the different types of message which can be logged to the database. Select the required message type from the list. Note that selecting a message type will also log all other message types which are above your selection in the list. For example, selecting to log Warning messages, will log Error and Fatal error messages as well. The Debug and Trace levels log more technical information which may be useful if you were experiencing problems running your forms.
The right-hand field of this option displays the database connection string for the database to which logging will be written, if logging to database is enabled. This database is specified when you publish your forms in Form Studio. To change the current database location, click on the  button at the end of the row. The SQL Database Connection dialog box will be displayed allowing you to edit the current connection string.
By default, logging to database is on and set to the Debug level.
- Changes you make here to the connection string will be overwritten by the values specified in Form Studio if you re-publish the forms in this web app.
Turn logging to a file on and off.
Logging to file is enabled if a logging level is displayed in the left-hand field of this option. If this box displays Off, logging to file is disabled and no log messages will be saved to your specified file.
To change the current setting, click on the box to drop-down the list of available options. The options represent the different types of message which can be logged to the file. Select the required message type from the list. Note that selecting a message type will also log all other message types which are above your selection in the list. For example, selecting to log Warning messages, will log Error and Fatal error messages as well. The Debug and Trace levels log more technical information which may be useful if you were experiencing problems running your forms.
The right-hand field of this option displays the name and file path of the file to which the log will be written. To change the file or its folder, you can edit the value displayed in the box (in the standard Windows manner) or, if you are running Form Manager on the same machine as the form(s) you are configuring, you can click on the  button at the end of the row to browse for the required file using a standard Windows file manager dialog box.
By default, logging to file is Off and generally we recommend using the database logging in preference to the file logging.
The default value for the logfile is:
${basedir}/ndllog.txt
where ${basedir} denotes the folder to which you published your form. For example, if you published a project called BulkyWasteCollections to the Default Web Site, ${basedir} would represent:
C:\inetpub\wwwroot\BulkyWasteCollections\
In order to create the log file, you will need to give the appropriate user write and modify access permissions to your specified log folder.
Note that if you change the value here, you will need to restart IIS before the change takes effect. You can restart IIS by running Microsoft's Internet Information Services Manager app, selecting the web server's machine name on the left and then choosing Restart in the right-hand side Actions menu.
Logging to file can only be turned on and off here in Form Manager, it is not available as an option when publishing forms in Form Studio.
Turn logging to the console on and off. When logging to console, the log messages are output such that they can be captured by a third-party debug viewer.
Logging to console is enabled if a logging level is displayed in this option. If the option displays Off, logging to console is disabled and no log messages will be output.
To change the current setting, click on the box to drop-down the list of available options. The options represent the different types of message which can be logged to the file. Select the required message type from the list. Note that selecting a message type will also log all other message types which are above your selection in the list. For example, selecting to log Warning messages, will log Error and Fatal error messages as well. The Debug and Trace levels log more technical information which may be useful if you were experiencing problems running your forms.
By default, logging to console is On and is set to the Info level. This setting will not do anything unless you run an app which captures output to the console.
Logging to console can only be turned on and off here in Form Manager, it is not available as an option when publishing forms in Form Studio.
If you make any changes to the Logging Level options, click on the  button to save your changes or
  to cancel any unsaved changes.
